You’ve made a great choice to host your WordPress websites and your first task is to move your sites. When it comes to migrating into HostNexus we’ve made it incredibly easy. There are a variety of methods to undertake your migrations.
- Migrate via the Website Importer in Plesk.
- Migrate via a WordPress plugin.
- Manually migrating into HostNexus using FTPS and database export/import.
- Ask us to migrate your sites for you.
Website Preview
Before we jump into the various migrations we should talk about our website preview feature. The Preview link is right there at the top of Plesk’s main page, Websites & Domains.

Your Preview URL, and access of the WordPress dashboard on the Preview URL, will not work correctly with SSL enabled in Plesk’s Hosting Settings. We therefore set up all new accounts with SSL disabled. If you have set up other websites please make sure you disable SSL during your testing phase. SSL is controlled under Hosting Settings in Plesk.

In Hosting Settings you set whether you want your domain to be domain.com or www.domain.com (no redirects necessary). You also activate/deactivate SSL and can set a 301 redirect so your domain defaults to https. During your testing phase, before you update your DNS/nameservers, be sure to disable SSL.

If you have set up WordPress with the domain’s SSL option enabled in Hosting Settings, and then install WordPress, your siteurl and home URLs will be set to https in your WordPress database. You may then find that your preview URL redirects to your main site or you otherwise can’t login to your WordPress dashboard. In this case you will need to edit these variables to http via phpMyAdmin. Click on Database in Plesk and then phpMyAdmin and edit these to variables in your wp_options table. We install WordPress with the wp_ table prefix renamed to a random string):
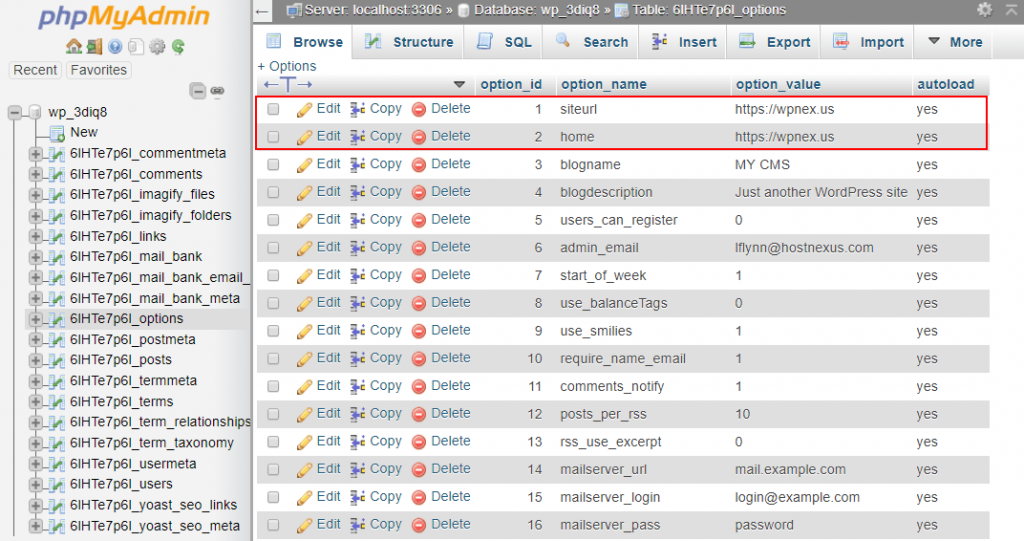
This is not necessary on any domains set up by HostNexus but if anyone is having site Preview problems in Plesk this should be helpful.
Accessing the WP Admin via the Preview URL
Okay, so you’re Preview URL is working. Now we need to login to our WordPress dashboard using the Preview URL. First of all if your domain is yet to resolve to our server and try to access the WordPress dashboard via Plesk’s auto-login feature you will find it does not work. So we need to login to our WordPress dashboard via the Preview URL. Find your Preview link on the main Websites & Domains page of Plesk (image above). Open your Preview URL and simply add /wp-login.php. In our example this would be:
http://96.125.178.146/plesk-site-preview/wpnex.us/96.125.178.146/wp-login.php.
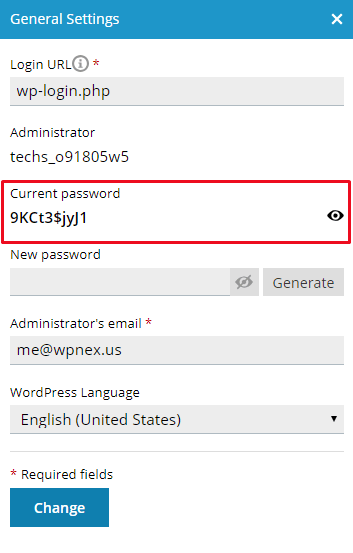
If your WordPress was installed by us when your account was set up or if you install WordPress with Install (Quick) a random admin username and password will be generated. To find this username and password click on [Setup] next to Log in inside the WordPress Toolkit:
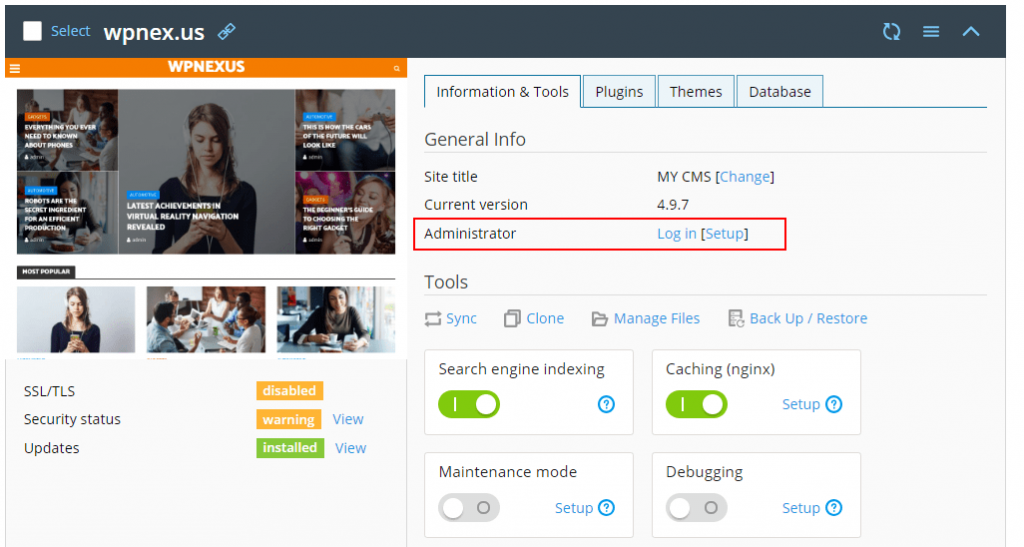
Your random username will be displayed. Click on the “eye” icon to view the password.
Website Preview Troubleshooting Tips
- If your Preview URL redirects you to your primary domain please ensure you disable “Permanent SEO-safe 301 redirect from HTTP to HTTPS” in Hosting Settings.
- If, when appending /wp-login.php to your Preview URL, it redirects to your domain’s login URL please make sure you fully disable SSL in Hosting Settings (uncheck the SSL box).
- Some caching and optimizing plugins that aggregate CSS and JS will add your domain’s base URL instead of a relative path. This can cause display issues depending on how your old web server is setup (Access-Control-Allow-Origin headers restricting content for example). Try disabling these plugins while in your testing phase and enabling them when your domain is live on our server.
- If you setup a WordPress site with SSL enabled your siteurl and home URLs will be set to https in your WordPress database. In order for the Website Preview to work, and to login to the WP dashboard on the preview URL, you will need to edit these variables to http using phpMyAdmin.
Also note that in Preview mode not all areas of WordPress Admin will function correctly. You may have issues installing plugins or uploading files. This is due to WordPress hard-coding the domain name in some functions. The Preview mode is mostly for checking the integrity and function of the front-end of your website after migration. If you require full WordPress admin functionality while your main domain points else you should create a staging site like staging.yourdomain.com. Then at your current web host or DNS provider add a “staging” A record that points to our IP. After modifications you can then use the WordPress Toolkit’s Sync feature to copy the staging site back to your main domain.
Last note on the Preview URL. You will see in Settings > General that the two variable WordPress Address (URL) and Site Address (URL) will list your Preview URL. This is purely because you are accessing the dashboard on the preview URL. When your site is live on our server and you access your dashboard normally you will see it display your domain correctly. Once testing is complete and you bring your site live you can set the two fields to https and activate SSL support in Plesk > Hosting Settings.
Method #1: Migrating into HostNexus via the Website Importer in Plesk
The first method you can use for migrating into HostNexus is the Website Importer in Plesk. In the WordPress Toolkit you will see Import at the top.

Clicking on this takes you to the Website Importer in Websites & Domains. Enter your domain name and your FTP username and password.
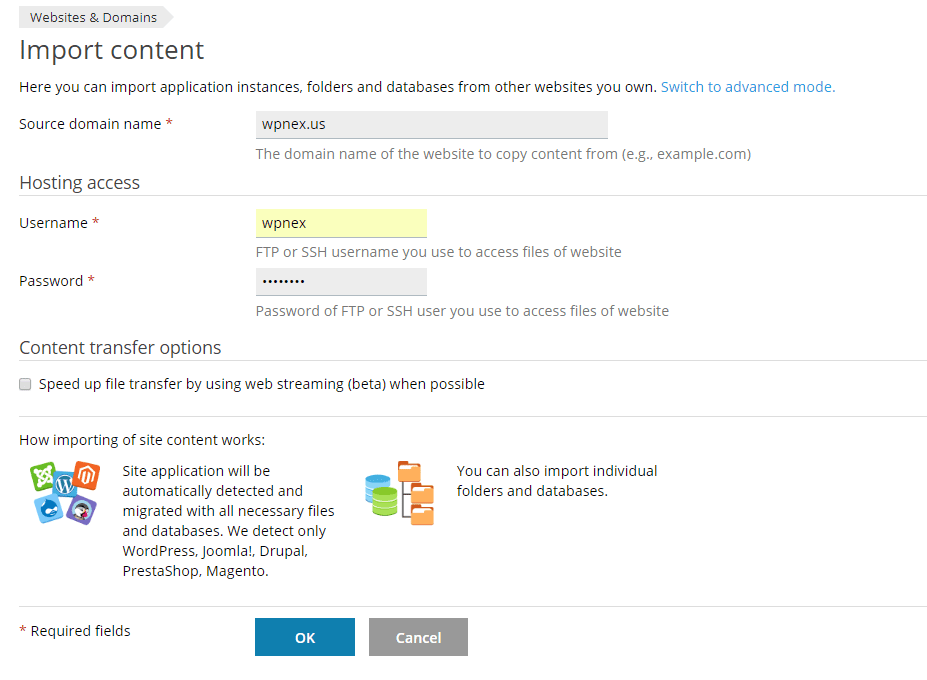
In the basic mode you configure these options:
- Destination domain name – This only appears if you have multiple domains or subdomains. You can import to any of them.
- Source domain name – The remote domain that you control to copy content from.
- Username/Password – The FTP or SSH user/pass you use to access the remote domain.
Select the “Speed up file transfer by using web streaming (beta) when possible” checkbox if you have a large number of small files to import. If you have an unstable Internet connection, and you suspect that the import process may be interrupted, you can try this option. In this mode Plesk resumes any interrupted import instead of starting over. If you select the PHP GET option in the Advanced Options it relies on the remote server’s max_exectuion_time PHP setting. It is likely you will have an insufficiently large maximum execution time set on the remote domain. The streaming method will circumvent this setting.
The Importer also has an Advanced Mode with the follow extra options:
- Source website URL – Specify full URL of the website, which corresponds to the source document root. (E.g. https://domain.com/blog/).
- Source document root – Specify a path related to FTP/SSH root. The path should be available by HTTP. (E.g. /public_html on Cpanel and /httpdocs on Plesk).
- Connection type – Automatic, FTP and SSH. Useful for SFTP.
- Files root – Path to start scan for files, applications and document root, related to FTP/SSH root. When not specified, default is used: FTP root or home directory of SSH user.
- SSH port – Displays when SSH connection type is selected.
- Get list of files mode – Automatic, FTP/SSH, PHP, PHP with FTP/SSH Fallback.
- Way to transfer files – Displays when SSH connection type is selections. SSH transfer options are rsync and SCP.
Once you’ve configured your Import settings click OK and the Importer will first connect to your target domain and scan the contents.
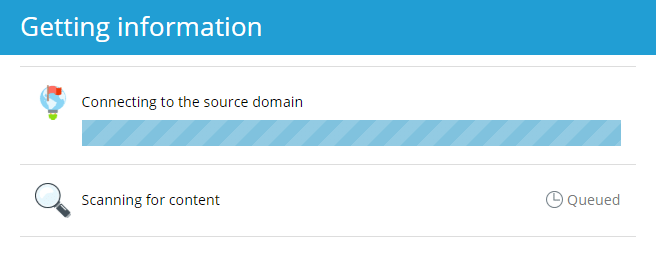
Once connected it will detect a WordPress instance on the target domain and any extra folders and databases. Before continuing make sure you understand that the import process will overwrite existing files on the new server.

The Importer will auto-detect WordPress instances and import files and the database related to that WordPress instance. Click the checkbox next to the source installation path and click Start Import.

If your WordPress instance is installed in a sub-directory like /blog you can still import your root domain’s folders. If you have multiple databases the Importer can also detect and import them.
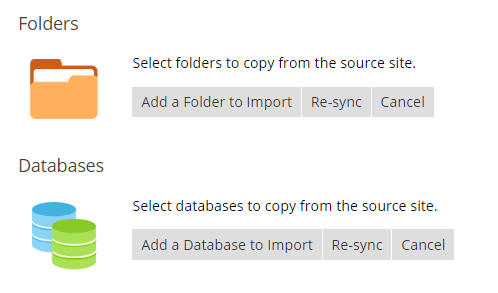
Please be aware that the standard importer takes some time. Allow 10 minutes for 1gb data on average. The Importer will work in the background and the page can be closed if needed. Hopefully when you get back you’ll be rewarded with:

Method #2: Migrating into HostNexus via a WordPress plugin (Migrate Guru)
The second method you can use for migrating into HostNexus is a fantastic plugin called Migrate Guru. Migrate Guru is a joy to use. Unlike other migration plugins you don’t have to create and download complicated packages. It migrates your files from your old server to your new server and that’s it. The settings to migrate to a HostNexus server are specific though you’ll need to follow these steps. The final step also involves a critical phpMyAdmin edit.
On your source domain (the domain you are moving), login to WP Admin and search for Migrate Guru in the plugins directory. Go ahead and install & activate.
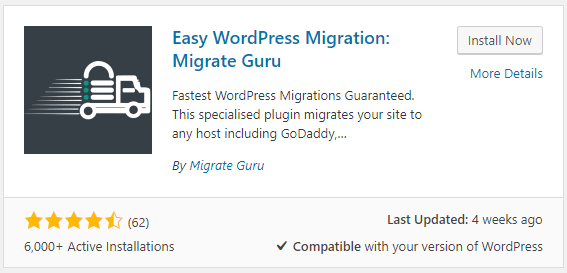
 Migrate Guru now appears as a menu option in WordPress.
Click on it and then enter your email address and agree to their Terms of Service and hit Migrate.
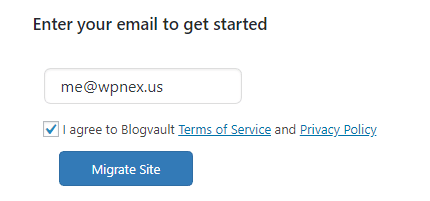
You will now be taken to a BlogVault page. Select FTP on the bottom right.

These are the settings:
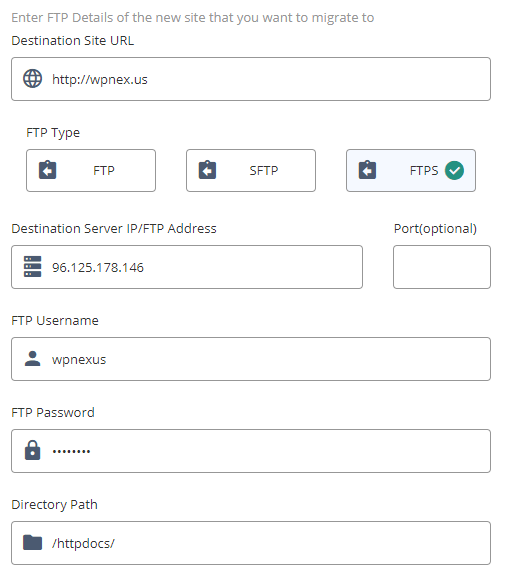
- Destination Site URL – http://yourdomain.com.
- FTP Type – FTPS (we only allow FTPS connections, no plain FTP).
- Destination Server IP – Listed at the top of Plesk’s Websites & Domains or in Web Hosting Access.
- FTP Username – Your FTP username found in Web Hosting Access in Plesk.
- FTP Password – Your FTP username found in Web Hosting Access in Plesk.
- Directory Path – /httpdocs/.
Let’s go over a few of those settings. First all in Destination Site URL put http://yourdomain.com or http://www.yourdomain.com. Do NOT put your Preview URL and do NOT put https. This settings is written into the database on the target server in siteurl and home in the options table. If you remember we need to have this set to http in order to Preview correctly. We also need http set to login to WP Admin on the Preview URL. Migrate Guru will connect to the target server with the Destination Server IP as FTP hostname. Also be sure to select FTPS as FTP Type. Our servers don’t also plain FTP connections at all. Plain FTP connections do not encrypt passwords when sending them to the server. Plain FTP is very insecure and is a major source of malware related issues.
If configured correctly Migrate Guru will connect and FTP your files server to server and import your database.

How To Manage SSL During A Migration
Once you have migrated your site and you are ready to go live on our server you can change your nameservers or point your DNS to our server. Before you do this however, you should make sure your site is properly configured for SSL. WordPress was set up with SSL disabled so your URLs in the database are HTTP rather than HTTPS. A lot of people will wait for their domain to resolve to the new server to change the URLs to HTTPS in Settings > General. But you can be proactive and change it right now in phpMyAdmin. Just load phpMyAdmin and click on the _options table. Click Edit next to siteurl and home and change the URL to https://your domain.com (or https://www.yourdomain.com).

That takes care of WordPress. Next step is to enable SSL in Hosting Settings and set the 301 redirect to HTTPS.

If you are familiar with Let’s Encrypt you may know that it can only be activated on a server if the domain resolves there. This is due to the validation technique that Let’s Encrypt uses. If you don’t want to wait, risking your visitors visiting your site without a valid SSL certificate, you can move your current certificate to our server. All you need is access to the certificate files on your current control panel. You will need your Private Key (RSA Key), the Certificate file and the CA Certificate. In Plesk find SSL/TLS Certificates in Websites & Domains:

Click on Add SSL/TLS Certificate:
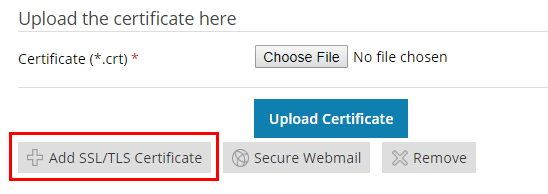
At the top of the page the new certificate a name. In this example I’m calling it “Let’s Encrypt NEW”:

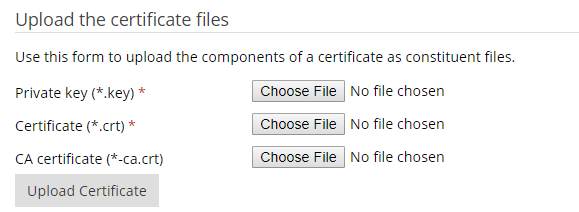
Next you have 2 options. You can upload certificate files:
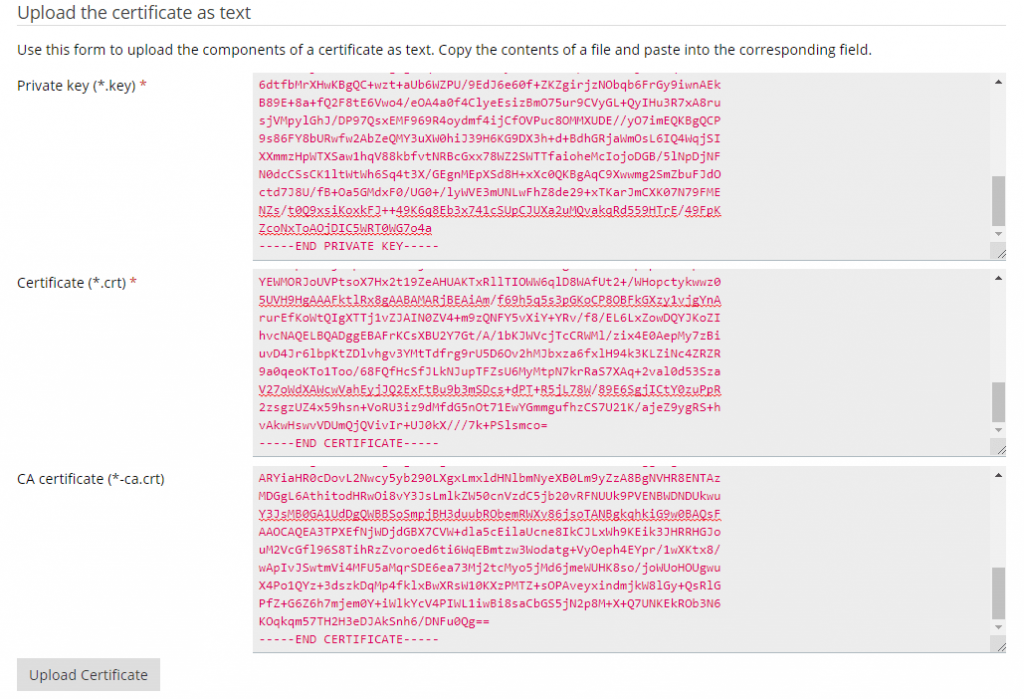
Or you can paste in certificate text (which is what I’m doing here):
And now when we go back into Hosting Settings our new certificate will appear in the Certificate drop-down menu. Just select it and click OK at the bottom.

Now you can safely update your nameservers or DNS and not have to worry about any SSL configuration when your site is live on our servers.
Method #3: Migrate manually using FTP and database import/export
If you choose to migrate manually you first be uploading your files via FTP. When connecting via FTP remember to use FTPS/FTPES as we don’t allow plain FTP connections. Every FTP client supports this and we have a tutorial about connecting to FTPS using FileZilla. This is what it looks like in FileZilla’s Site Manager:

- In Host enter domain name (if domain resolves to our server). Otherwise use your new server IP.
- Under Protocol you want FTP – File Transfer Protocol (not SFTP)
- In Encryption select Require explicit FTP over TLS
- Logon Type: Normal.
- Enter username and password.
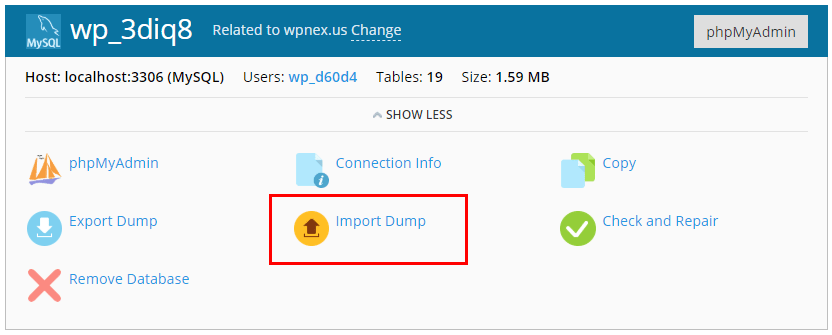
Export your WordPress database in your current host’s control panel and import it using Plesk’s handy Import tool. In Plesk click on Databases and then you’ll see Import Dump. Click on that, browse to find your .sql file on your workstation and upload. Easy stuff.
Migration Method #4: Ask us!
We will gladly migrate your WordPress sites for you. Just submit a support request and let us know the following:
- Domain name to migrate.
- Current FTP username & password.
- Current control panel login URL and access details.
- Current WordPress dashboard URL and access details.


Add Comment